Here's a step-by-step guide on how to cut, replace, and repair an exhaust pipe using adapters, welding with a coated coat hanger, or non-welding option with a band, lap, or v-clamps.
**Tools Required**
- Safety glasses
- Gloves
- Wrenches
- Hacksaw or (Reciprocating Saw is most effective)
- Exhaust pipe cutter (optional)
- Replacement exhaust pipe and/or adapters
- Welding equipment
- Coated Coat Hanger (optional if no welding rod)
- Band Clamps, Lap Bands or V Clamps (non-weld optional)
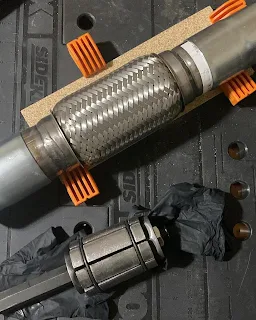
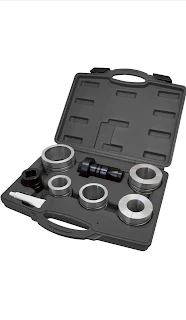
- Pipe Expander Adapter or Kit (optional)
TIPS:
Replacement Exhaust Pipe
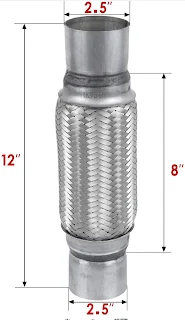
**When selecting your replacement parts, it is important to choose a replacement pipe that is the same size or slightly larger than the existing exhaust pipe. However, if you opt for a slightly larger replacement pipe, ensure that it can still fit “snugly” into place. A snug fit is crucial to maintaining the integrity and functionality of the exhaust system. Look for connectors or adapters that go OVER the pipes NOT inside!
(Explanation: If you use a connector, adapter, or replacement pipe that fits inside instead of the same size or goes over the existing exhaust pipe you cannot ensure the integrity of the connection or weld and will most likely result in a temporary fix instead of a long term fix which results in more cost and time.)
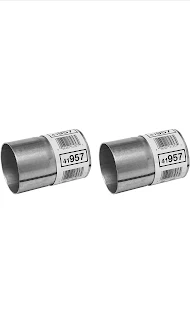
Connector or Adapter
When searching for connectors or adapters for your exhaust pipe, it is recommended to look for options that fit OVER the pipes rather than inside them. These types of connectors or adapters, commonly known as slip-on or over-the-pipe connectors, provide a snug fit and ensure a secure connection between the pipes. This design helps to maintain the proper alignment and functionality of the exhaust system while allowing for easy installation and removal when needed.
**If you are having trouble finding a connector or adapter that snugly fits over your existing pipe, you can measure the outside diameter of the exhaust pipe and take your replacement pipe, adapters or connectors that are the same size as your existing exhaust pipe (outer diameter) to an exhaust shop, such as maxi mufflers, and pay to have the ends expanded to a snug fit over your existing exhaust pipe.
**If you don’t have some of the tools you need for this job, you can rent some of them from AutoZone or O’Reilly Auto Parts for a temporary deposit upon return of the tools.
**Step 1: Safety First**
Ensure that you have the appropriate safety gear such as safety glasses and gloves to protect yourself during the process. Park your vehicle on a level surface and turn off the engine.
**Step 2: Locate the Damaged Exhaust Pipe**
Identify the damaged section of the exhaust pipe by inspecting for signs of rust, cracks, holes, or leaks. Start your vehicle and listen for any unusual sounds or noises coming from the exhaust system.
**Step 3: Remove the Damaged Exhaust Pipe**
Pipe Cutter
Loosen and remove the clamps that hold the damaged section in place. Use a wrench to loosen the clamps and slide them off the pipe. If the clamps are tight, apply a penetrating oil to help loosen them.
Cut the damaged section of the exhaust pipe using a hacksaw, reciprocating saw, or tailpipe cutters. Cut as close to the clamps as possible to remove the damaged portion. Smooth out ends if necessary with a grinder.
**Step 4: Measure and Prepare the Replacement Exhaust Pipe or Adapters**
Measure the length of the damaged section that was removed. If you're using a replacement exhaust pipe, cut it to match the measured length. Alternatively, if you're using adapters, ensure they are compatible with your existing exhaust system.
**Step 5: Welding with Coated Coat Hanger or Using Band Clamps**
Option 1: Welding with Coated Coat Hanger
- If you have welding equipment and experience, you can weld the replacement pipe or adapters to the existing exhaust system. Ensure that you use a coated coat hanger or welding rod specifically designed for exhaust systems to prevent corrosion.
Option 2: Using Band Clamps, Lap Bands, or V Clamps
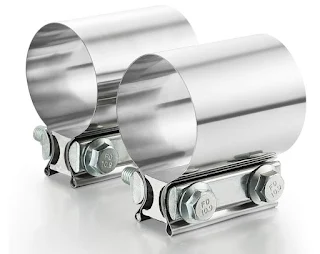
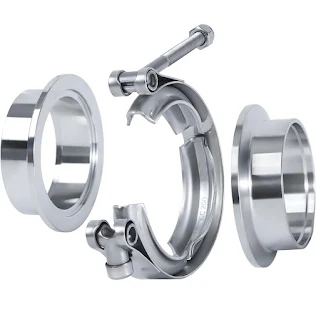
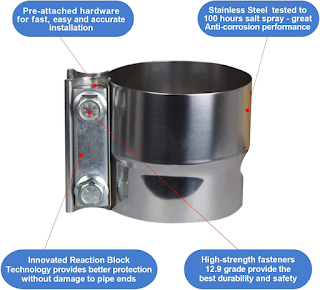
- If welding is not an option or you prefer a removable solution, use band clamps (same size pipe ends), v clamps, or lap bands (overlap is larger than existing exhaust pipe.) Slide the band clamps onto the ends of the replacement pipe or adapters before inserting them into place. Position the replacement pipe or adapters between the existing exhaust pipes and tighten the band clamps securely using a wrench.
Band Clamps
V Clamps
**Step 6: Test and Adjust**
Once the replacement pipe or adapters are securely in place, start your vehicle and listen for any unusual sounds or leaks. Check for proper alignment and make any necessary adjustments to ensure a proper fit.
By following these steps and using either adapters with welding or band clamps, you can successfully cut, replace, and repair an exhaust pipe on your own. Remember to exercise caution and seek professional assistance if needed.
If you have any questions, please leave us a comment!








No comments:
Post a Comment